 ( 167 ) 19-Apr-2013
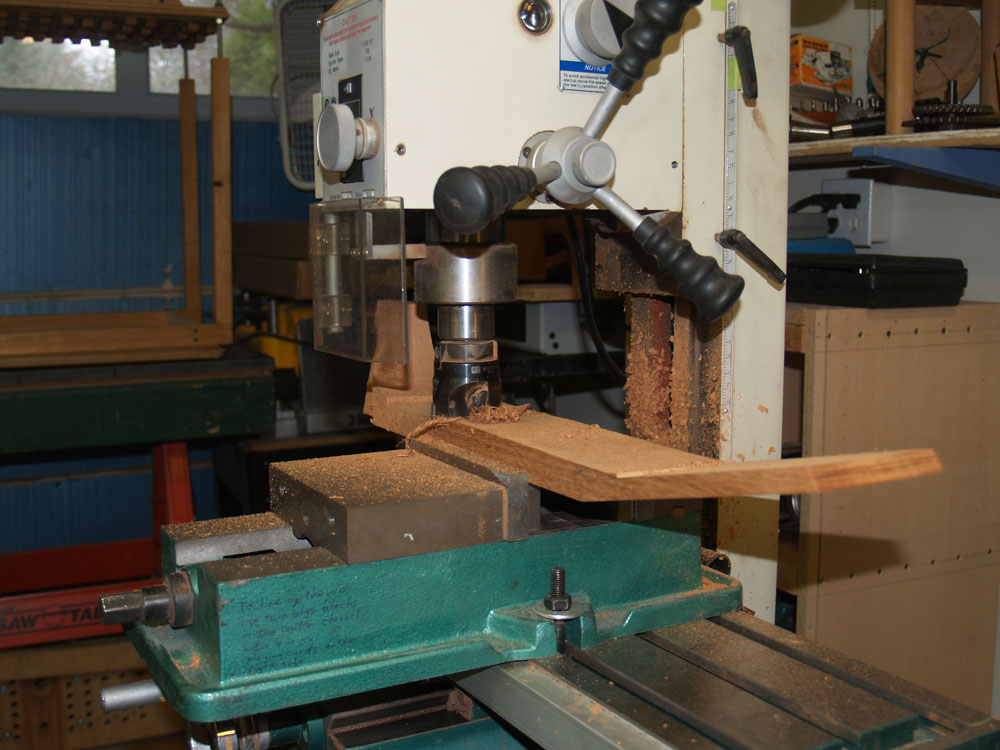
Here I am putting a bevel on the reinforcing back strip. This strip will prevent the two plates that make up the back from coming apart over time and stress.
Cocobolo Body 15 inch lower bout
Adirondack Spruce Top
Lion Theme Marquetry
Mahogany Neck
Ebony Fretboard
Gold Frets & Gotoh Tuners
Padauk
Binding
25.4 Inch Scale Length
( 167 ) 19-Apr-2013
Here I am putting a bevel on the reinforcing back strip. This strip will prevent the two plates that make up the back from coming apart over time and stress.
 ( 168 ) 19-Apr-2013
A look at the bevel.
 ( 169 ) 19-Apr-2013
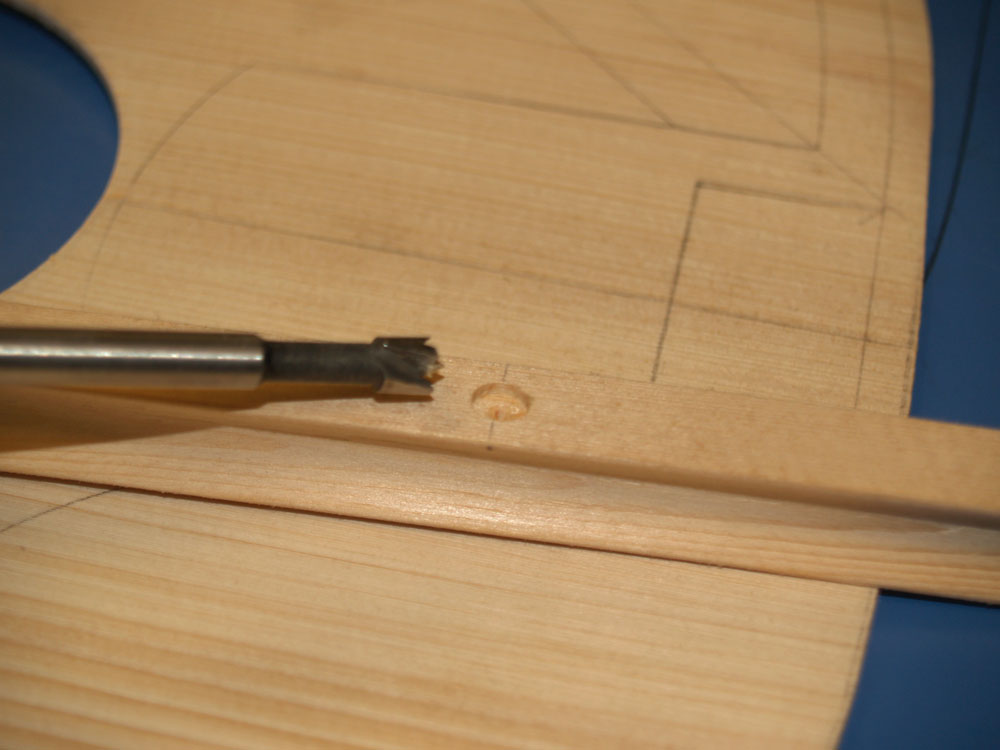
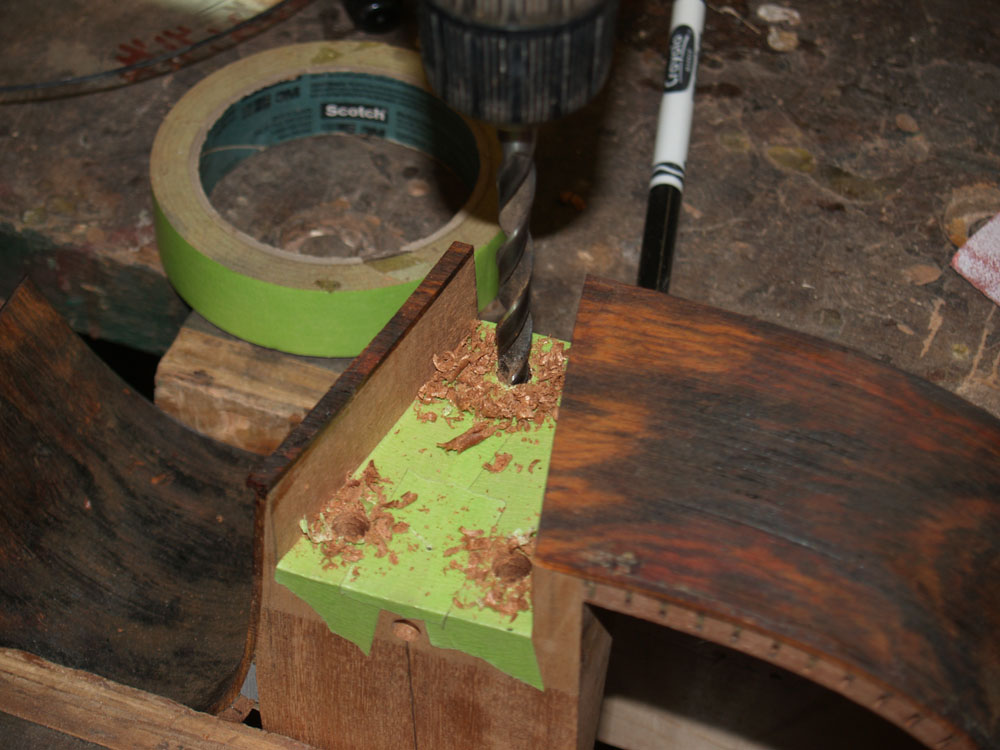
To help me align the top and back with the rim I use these fiducial buttons. These buttons will hold them in place when they get glued to the rim. Before the glue sets up, it can be quite slippery and the top and back can move out of alignment.
 ( 170 ) 19-Apr-2013
I start by drilling a shallow hole and inserting piece of doweling that stands proud of the surface.
 ( 171 ) 19-Apr-2013
I place a small drop of CA glue on the end of the dowel. Then I carefully place rim onto the back.
 ( 172 ) 19-Apr-2013
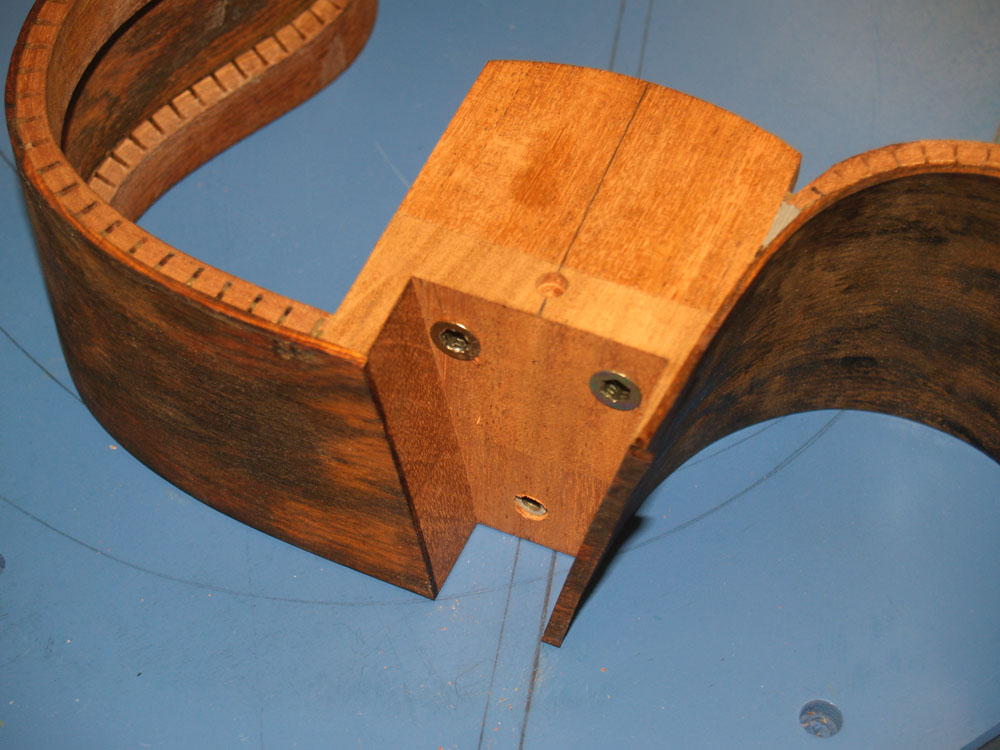
After the glue sets up I pull the rim off. The button sticks to the back plate. After trimming down the button, I can accurately place the rim on the back plate ensuring that everything lines up.
 ( 173 ) 19-Apr-2013
Here you can see the reinforcing strips glued in place.
 ( 174 ) 19-Apr-2013
Now I am turning my attention to creating the rosette. In this picture I am using the milling machine to route out the burled maple ring that will form the center of the rosette.
 ( 175 ) 19-Apr-2013
The central disk will be used as the backdrop for the contra-rosette.
 ( 176 ) 19-Apr-2013
Here is the central ring and the original piece of buled maple. I will use it to make the tail graft.
 ( 177 ) 19-Apr-2013
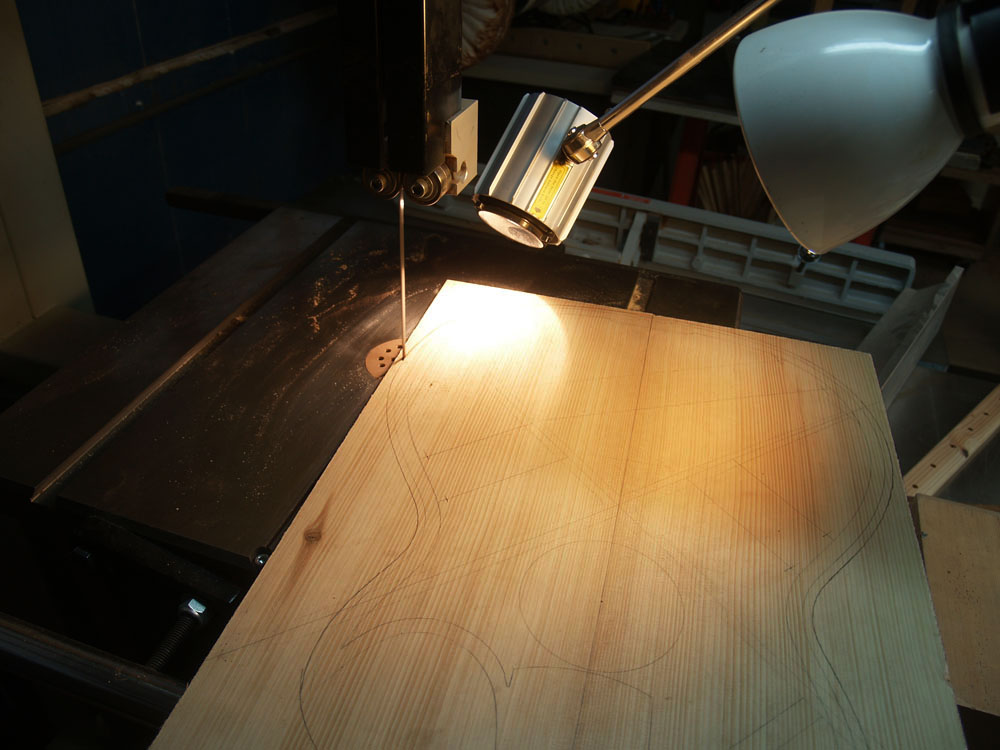
Before I set the rosette I need to cut out the top plate.
 ( 178 ) 19-Apr-2013
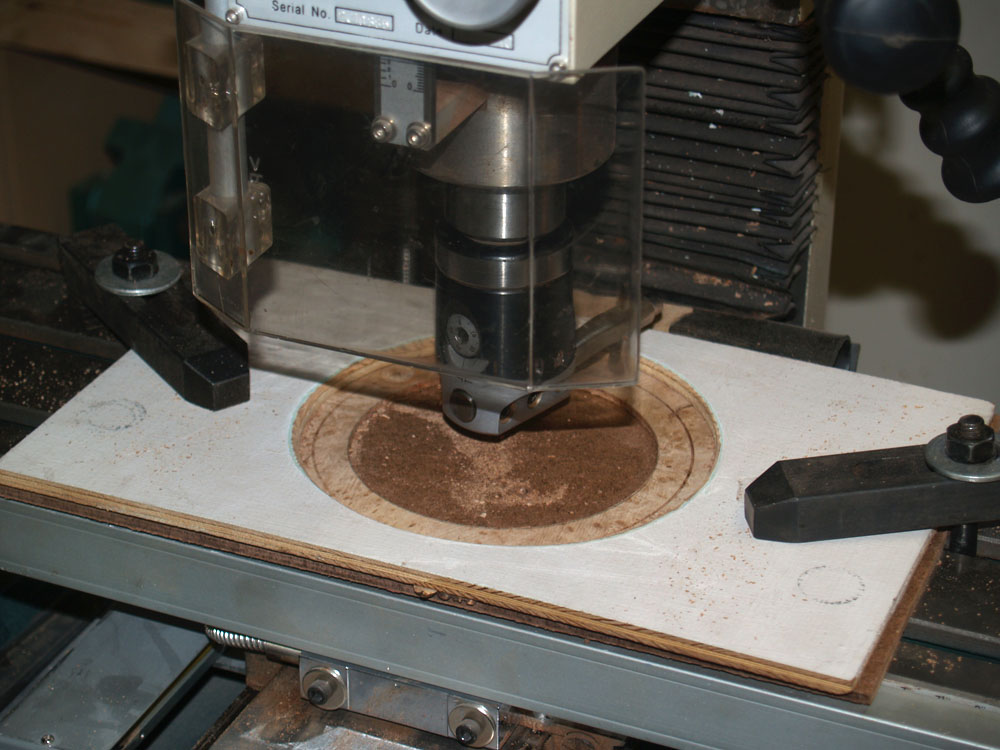
I use the milling machine and my circle cutter to route out the channels for the rosette.
 ( 179 ) 19-Apr-2013
The micro adjustment on the circle cutter lets me create very accurate channels.
 ( 180 ) 19-Apr-2013
A bit of glue goes onto the back of the central ring of the rosette.
 ( 181 ) 19-Apr-2013
I press the ring into the channel making sure it is well seated. The inner and outer rings get installed next.
 ( 182 ) 19-Apr-2013
Now back to the circle cutter to cut out the sound hole.
 ( 183 ) 19-Apr-2013
The rosette.
 ( 184 ) 19-Apr-2013
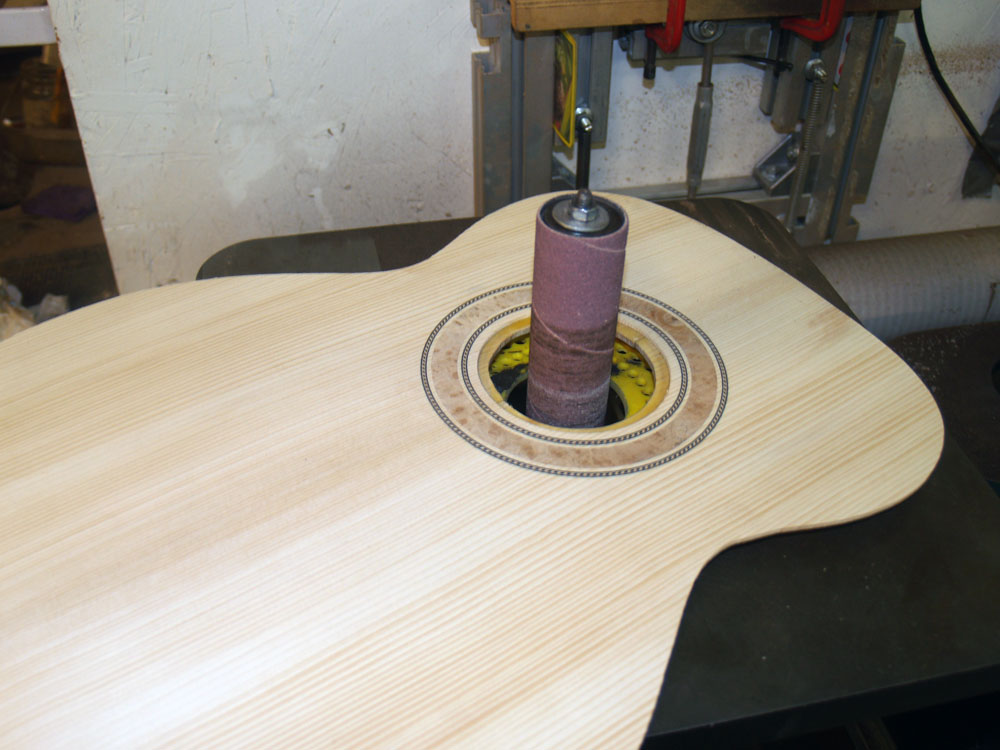
At this point the wood making up the rosette stands proud of the surface.
 ( 185 ) 19-Apr-2013
So, the top goes into my drum sander to sand everything on the top flush, and then I sand the back of the top so its final thickness is about 110 mils thick. As the top is worked this will be reduced to from 70 to 100 mils thick. Thinner near the edges.
 ( 186 ) 19-Apr-2013
After carefully laying out the placement of the braces, I use the same technique with fiducial buttons to help insure their placement. Here I have drilled a shallow hole in one of the braces.
 ( 187 ) 19-Apr-2013
The button stands proud of the surface.
 ( 188 ) 19-Apr-2013
Now with the brace locked down with the buttons, I can place the rim over the braces and mark where I will cut them off. I need to make sure the brace will get back to their proper placement because I want the ends of the braces to butt up against the rim. This will ensure the stresses get transfered through the braces, into the rim, rather than being transferred to the top.
 ( 189 ) 19-Apr-2013
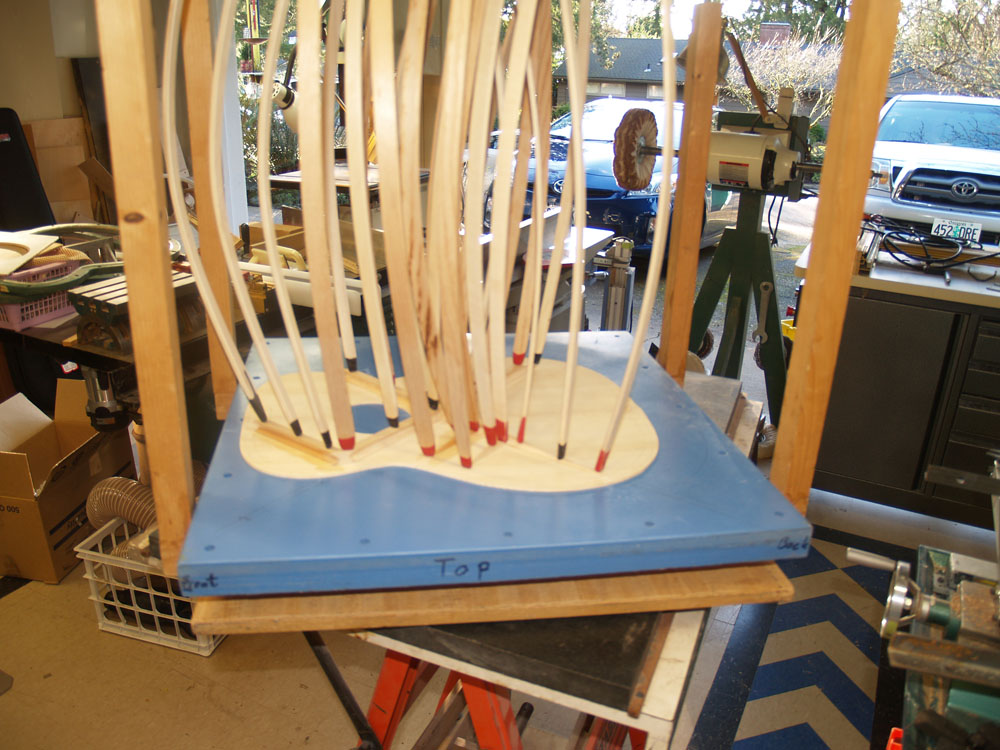
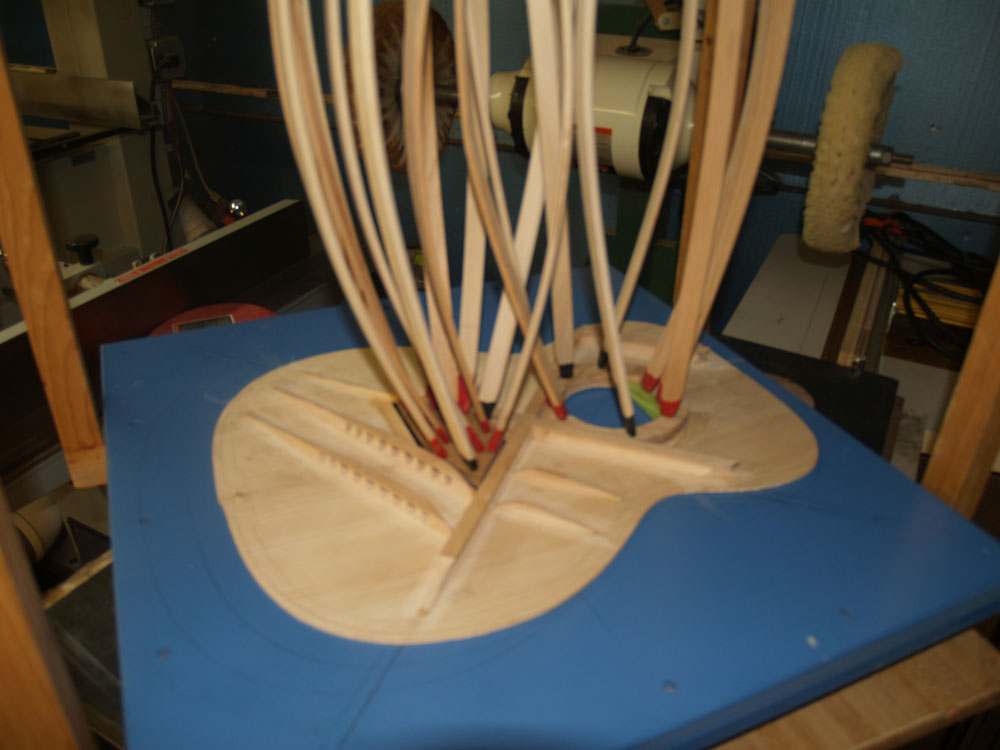
Once I have all of the braces cut to length they go into the go box and are glued in place.
 ( 190 ) 19-Apr-2013
Lots of go sticks.
 ( 191 ) 19-Apr-2013
The ends of the go sticks are dipped in room temperature vulcanizing rubber to so they will not dent the braces. The black tipped go stick are stiffer than the red tipped sticks.
 ( 192 ) 19-Apr-2013
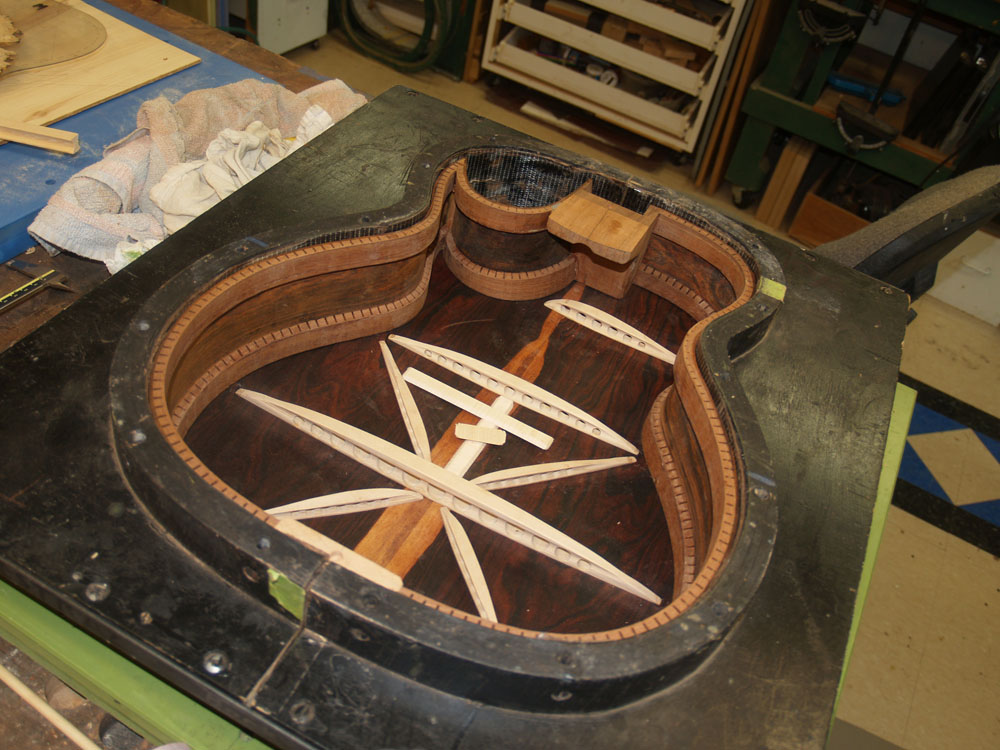
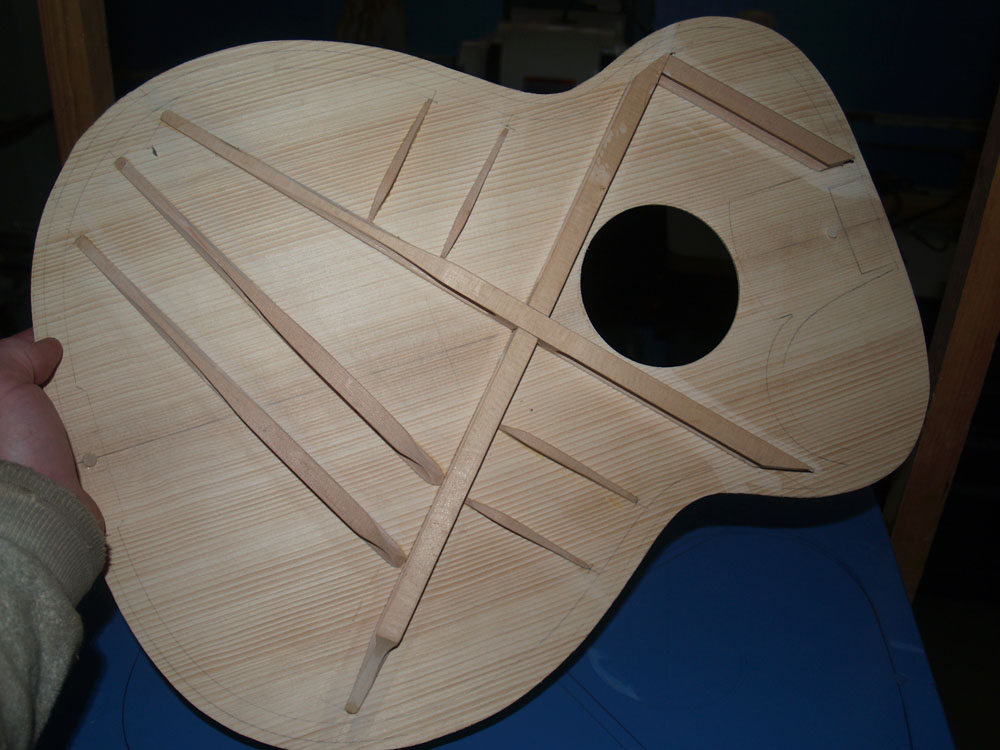
Here are the braces glued in place.
 ( 193 ) 19-Apr-2013
Now the bridge plate gets fabricated.
 ( 194 ) 19-Apr-2013
The sound hole ring is made from the excess material that the top was cut from. I try to use every piece of wood I can. I don't like to waste wood, given that the tree gave its life for my endeavours.
 ( 195 ) 19-Apr-2013
Here I have laid out the bridge plate and sound hole ring for inspection. You can also see how the braces fit snuggly against the rim.
 ( 196 ) 19-Apr-2013
I use the go box to glue them in place.
 ( 197 ) 19-Apr-2013
The sound hole ring was over sized, so I use m oscillating sander to sand it flush with the edge of the sound hole.
 ( 198 ) 19-Apr-2013
Now with all of the braces in place I go over the inside surface cleaning up any glue or rough spots. It helps the notes get out of the guitar better if the inside is nice and smooth, at least that is what Wayne Henderson says, and who am I to argue with Wayne. No one will ever see it, but it makes me feel right if the inside is as beautiful as the outside.
 ( 199 ) 19-Apr-2013
With the back of the top exposed, this is the time to install the piezo electric transducers. I run the cables through a stress relieving block to prevent undue stress being placed on the round transducers.
 ( 200 ) 19-Apr-2013
To prevent the sides from splitting, should the guitar every experience a short sharp shock- not recommended - I install side straps.
 ( 201 ) 19-Apr-2013
I glue them in place where the ends of the braces line up.
 ( 202 ) 19-Apr-2013
Now I am spending some time prepping the neck blank. After leveling the fretboard and head stock surfaces I trim the end of the neck blank square.
 ( 203 ) 19-Apr-2013
I use my router table to create the channel for the truss rod. Under tension and over time the neck takes on a bow. The truss rod helps to control the amount of bow in the neck. There are several types of truss rods. I use a double action rod that lets me introduce both positive and negative tension.
 ( 204 ) 19-Apr-2013
The truss rod sits under the fretboard and the adjustment bolt is accessed through the headstock. I orient the rod for access from the head stock so it can be adjusted with the strings in place and under tension. This avoids the necessity of removing the strings and accessing the adjustment bolt through the sound hole, guessing how much adjustment is needed, replacing the strings and hoping you got it right.
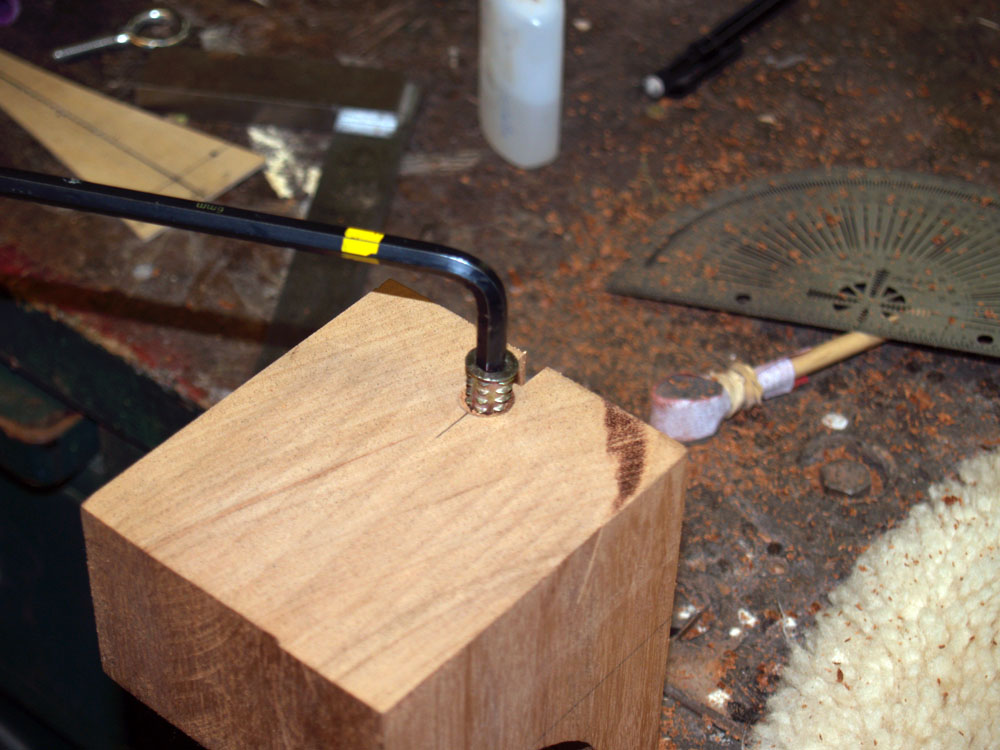
 ( 205 ) 19-Apr-2013
Here I am drilling the a hole in the end of the neck blank for the attachment bolt. This bolt hold the neck in place when the strings have been removed.
 ( 206 ) 19-Apr-2013
I counter sink the hole so the flange of thewood insert will lay flush.
 ( 207 ) 19-Apr-2013
Inserting the 1/4-20 wood insert.
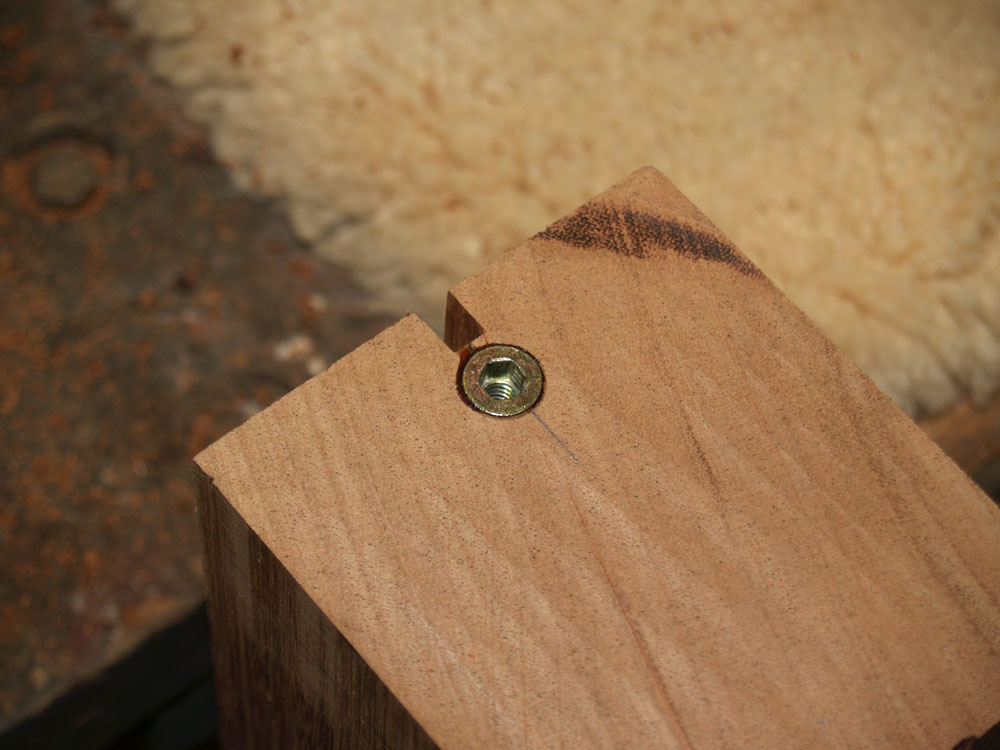 ( 208 ) 19-Apr-2013
I glue the wood insert in place to prevent it from being twisted out.
 ( 209 ) 19-Apr-2013
Now I have mounted the neck blank onto the heel block template fixture. This template has the same shape as the heel block channel I routed into the heel block in pictures 104 - 114
 ( 210 ) 19-Apr-2013
I use this fixture as a safety device to keep my fingers away from the very scare router bit.
 ( 211 ) 19-Apr-2013
A look at the routed heel still in the fixture.
 ( 212 ) 19-Apr-2013
Sans fixture.
 ( 213 ) 19-Apr-2013
Now with my milling machine I mill the bottom side of the neck blank so it is close to its final dimension.
 ( 214 ) 19-Apr-2013
A second view of the neck being milled to dimension.
 ( 215 ) 19-Apr-2013
I leave the transition areas between the headstock and the heel with extra material. These areas will be shaped by hand once the fretboard is attached.
 ( 216 ) 19-Apr-2013
Now to create the compound radius fretboard. I use a special tool fixture - the universal radiusator - to shape the fretboard surface into a section of a cone. We use a compound radius fretboard to accommodate the taper in the set of strings from the nut to the saddle.
 ( 217 ) 19-Apr-2013
This tool is essentially a two armed pendulum with arms that are different lengths. When swung back and forth over the router bit the tie bar sweeps out a section of a cone. I slide the fixture along the rails to shape the whole surface of the fretboard. By adjusting the lengths of the arms I can create a compound radiused fretboard of any dimension.
 ( 218 ) 19-Apr-2013
Here is a look at the end of the radiused fretboard. The radius of curvature is smaller near the nut and flattens out as it gets closer to the saddle.
 ( 219 ) 19-Apr-2013
After the initial surface is radiused I fine tune it using a straight edge and a feeler gauge to make sure there are no low or high spots. All of this is done to prevent any buzzing once the strings are attached.
 ( 220 ) 19-Apr-2013
I have a set of templates I use in my fretboard slotting tool to position the slotting sled.
 ( 221 ) 19-Apr-2013
I have a small circular saw attachment for my dremel tool that cuts a nice clean slot.
 ( 222 ) 19-Apr-2013
The fretboard with its slots cut.
 ( 223 ) 19-Apr-2013
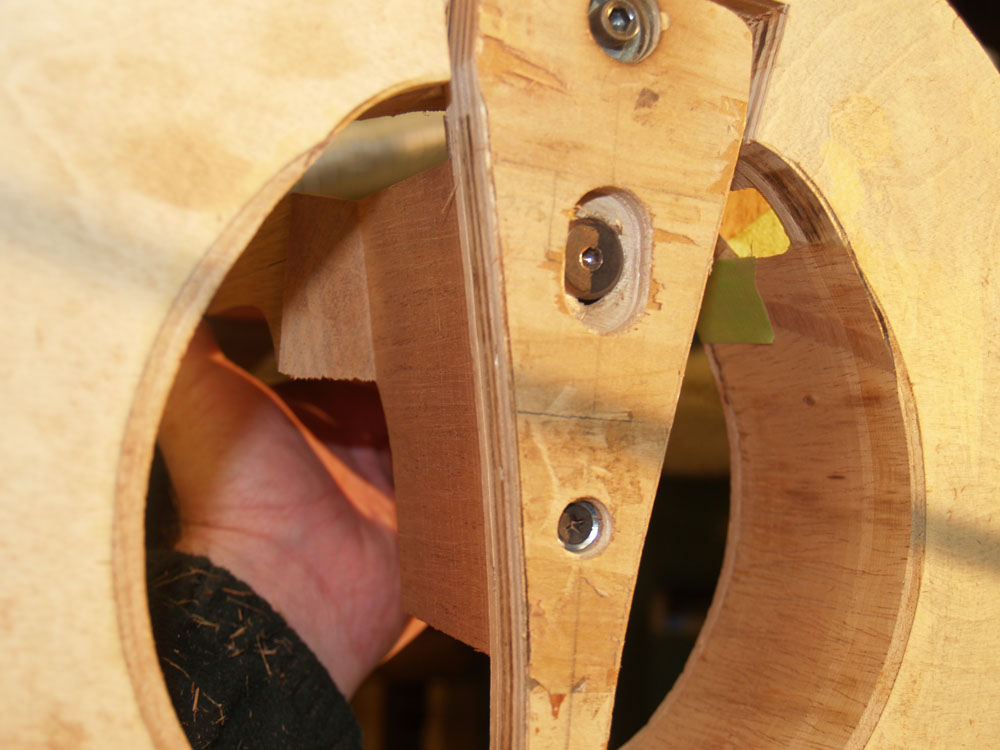
Now I am drilling the holes in the heel block channel of the rim for the attachment and adjustment hardware. The two holes at the top will have inserts for two set screws used to adjust the yaw of the neck.The hole at the bottom has an insert that the neck angle adjustment bolt goes into.
 ( 224 ) 19-Apr-2013
The neck angle adjustment insert goes into the heel block from the inside.
 ( 225 ) 19-Apr-2013
Hear you can see the set of wood inserts that the end of the neck will mate to. The form a solid tripod.
 ( 226 ) 19-Apr-2013
While I am working on the rim I install the tail graft, made from the same burled maple that the rosette is made from.
 ( 227 ) 19-Apr-2013
Everything stands proud.
 ( 228 ) 19-Apr-2013
A little bit of sanding.
 ( 229 ) 19-Apr-2013
And putting a bevel in the tail block.
 ( 230 ) 19-Apr-2013
The tail graft.